 If you could choose one messy room in your home and have it transformed into a space that looked glamorous in six weeks, which room would you choose?
If you’re Christine Da Costa, sought-after interior decorator and published writer in Toronto, you would choose the garage.
Taking on the One Room Challenge
Christina did more than just transform a garage, she did it as part of an online event for the One Room Challenge. Created by Linda, a New Jersey home and garden design blogger (Calling It Home), this biannual event is open to only 20 designers and decorators each round. Posting weekly updates to your blog is part of the process.
“Man caves aren’t really pretty, so this One Room Challenge is not the usual project you will see on a website full of pretty bedrooms, bathrooms, and laundry rooms”, says Christine.
“I have never done a garage before. In this case, my husband became my client and Garage Living carried out the renovation – but my husband and I created the vision of what we (or should I say he) wanted to have”, she added.
Garage renovation goals
Christine and her husband had already been discussing how to improve their garage space, so it made sense for her to choose this room for the challenge. There were five things she wanted to bring to the garage renovation:
- Improve organization
- Increase storage
- Maximize the use of vertical space
- Create a clean, odor-free, and comfortable environment
- Design an art wall
Planning the garage renovation
After creating an initial plan, Christine reached out to the designers at Garage Living for help turning her plans into reality.
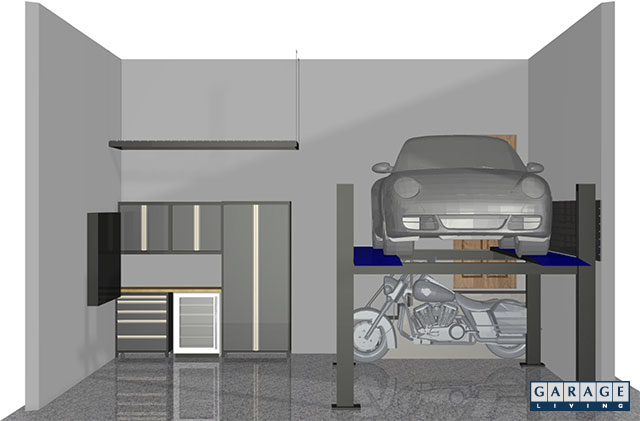
They provided a detailed 3D floor plan, which showed exactly how Garage Living planned to utilize the room’s high ceilings. One of the biggest changes involved adding a car lift to store her husband’s summer car, making room to store a motorcycle and second vehicle underneath.

The floor plan also showed where to install the cabinetry to store tools, storage bins, recycling bins, and a bar fridge. After Christine’s approval, they moved on to the next stages of the project.
Adding flooring, cabinetry, slatwall, and a car lift
In week three of the challenge, Christine decided on the garage flooring, cabinetry, backsplash, countertops, and the wall color.
Christine decided on a Floortex™ floor coating because of its durability and the low maintenance it needed. She chose the Quicksilver color.
Christine chose Garage Living’s sleek, stylish and oh-so-practical Signature Cabinetry in charcoal grey. The stainless steel backsplash adds a bit of style and edge to the design while a maple butcher block countertop adds a touch of homieness.

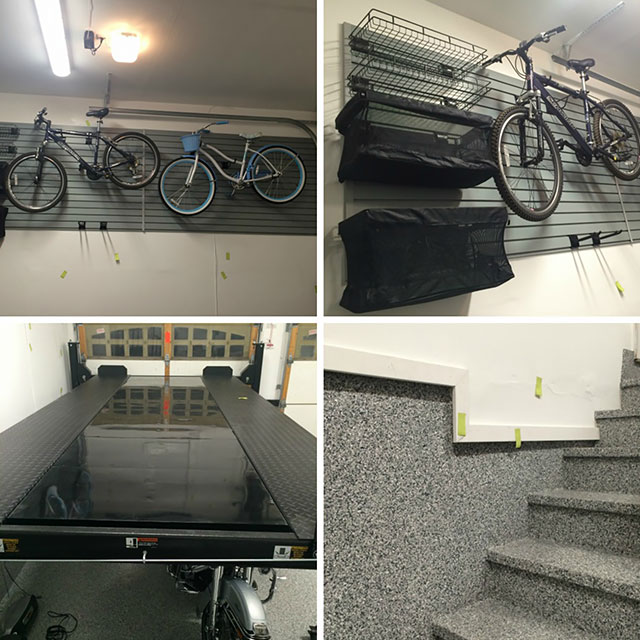
A car lift was also installed to store an extra vehicle and maximize the storage space in the garage. Christine said that “to watch the car raise and lower is really quite awesome. It’s like a fun elevator with no walls.”
A slatwall storage system was added to the wall beside the car lift. The hanging storage keeps the floor area tidy and is ideal for seasonal items and bikes. If the car lift isn’t being used for a vehicle, it is used as an elevator to reach the bikes hanging on the wall – very efficient!
The final reveal
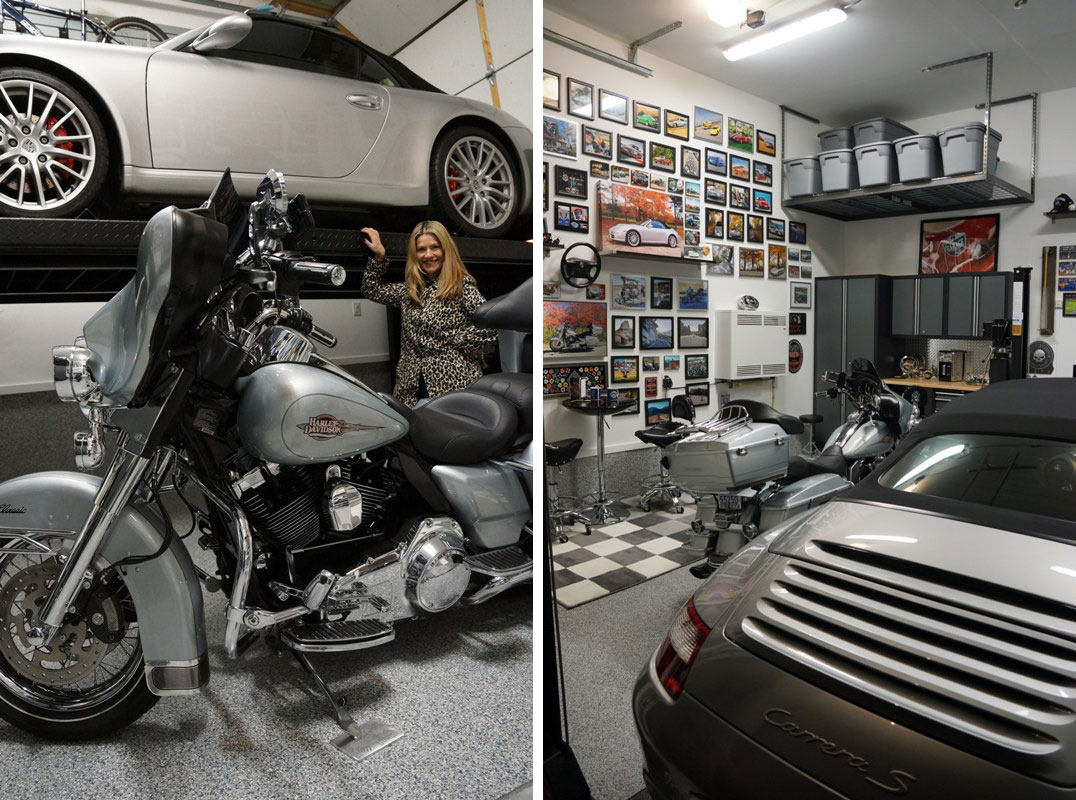
After several weeks of documented planning and renovating, the project was completed. Here is a look at the final reveal.

The result? Christine said, “I am really proud of how this man cave garage turned out! Oh, and my husband is currently on cloud 9.”
For more information on this garage renovation project, including styling tips and practical advice from Christine, visit her site - Decor By Christine.
Transform your garage just like Christine did
Is your garage in need of a remodel to get it more organized and looking nicer? Garage Living can transform it, just as we did with Christine’s garage.
Schedule a free design consultation with us to begin your own one room challenge to upgrade your garage.